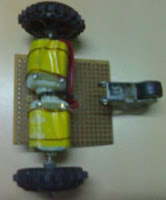
One such simplest form of Line Tracer is discussed here. We use two line sensing elements as shown in figure.
PROBLEM ANALYSIS:
There are three conditions:
A) Both sensors out of line:
The line is straight and both sensors are in black portion.
So the bot must in ‘Forward’ direction.
Hence, both wheels (Left and Right) must consecutively
move in forward direction.
B) Right sensor on Line:
The right sensor is on line and we can see that the bot needs to move in the ‘Right’ direction.
Hence, Left wheel must move in forward direction and Right wheel must be stopped (or move backwards).
C) Left sensor on Line:
The left sensor is on line and we can see that the bot needs to move in the ‘Left’ direction.
Hence, Right wheel must move in forward direction and Left wheel must be stopped (or move backwards).
Analysis Results:
1) Right Sensor On Line => Right Wheel Stopped => Right Motor Stopped => Move Right or Stop
else
Right Sensor Not On Line => Right Wheel Running => Right Motor Running => Move Left or Forward
2) Left Sensor On Line => Left Wheel Stopped => Left Motor Stopped => Move Left or Stop
else
Left Sensor Not On Line => Left Wheel Running => Left Motor Running => Move Right or Forward
Programming Code:
// White Line Follower Source Code
// By : Sujit K. Nayak
// Web : http://www.sanuzrworld.co.nr
//Using CodeVisionAVR Compiler
// Here: PORTD.4 and PORTD.5 to control the motors. And use ADC0 and ADC1 for sensor inputs.
#include
// Auto-Generated Initialization Codes using CodeWizardAVR in CodeVision
#define LEFT_SENSOR read_adc(0)
#define RIGHT_SENSOR read_adc(1)
#define LEFT_MOTOR PORTD.4
#define RIGHT_MOTOR PORTD.5
void main()
{
// Auto-Generated Initialization Codes using CodeWizardAVR in CodeVision
while(1)
{
if (LEFT_SENSOR > 128) // 128 can be changed depending on sensor output
//or “if (LEFT_SENSOR > read_adc(2))” for external tuning
LEFT_MOTOR = 0; // output 0 Volts at PORTD.4
else
LEFT_MOTOR = 1; // output 5 Volts at PORTD.4
if (RIGHT_SENSOR > 128) //as above
RIGHT_MOTOR = 0;
else
RIGHT_MOTOR = 1;
}
}
We use CodeWizardAVR a code generator included in the CodeVisionAVR Compiler to configure the outputs and ADC inputs. The part of the code to be added after that is given in blue color above.
‘C’ Tip: ‘#define’ statements are to improve clarity and simplicity. The first word wherever in the program is replaced with the second word by the compiler. Hence, these 4 lines can be eliminated by doing the same manually. (eg. Write ‘read_adc(0)’ instead of ‘LEFT_MOTOR’ )


